Liese Prettia Hair Dye Review and Instructions
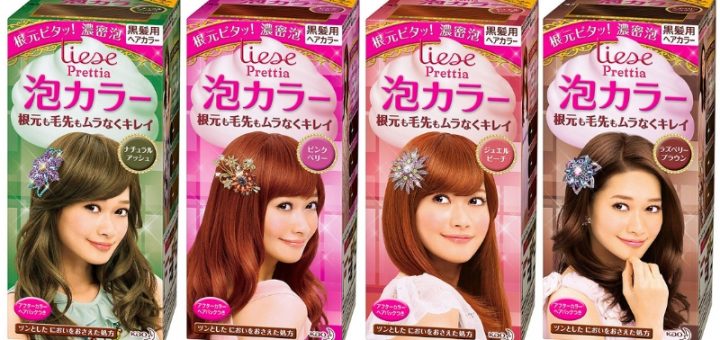
Hi everyone! Today I’m going to review my go-to drugstore hair dye, the Kao Prettia Liese Awa-Color (or “foam color”) range!
I’ll be honest, I’m not very adventurous or skilled when I dye my hair. I actually swore off doing anything myself for about a year after I tried to give myself highlights with box dye right before a holiday (I know, I know…) I came to Japan in the summer, wanting to lighten my hair a little and disguise the awkwardly growing-out highlights. Pretty much at random, I picked up a dye from the Liese Prettia Awa-Color range.
I’ve tried other Japanese hair dyes since, but I really like the Liese Prettia range for a few reasons. For one, it goes up to lighter colors than some other Japanese brands, which is great if you’re already starting at brown. I also find the foam to be thick and non-dripping, making it surprisingly neat and easy to use.
So, you already know I like this range! In this review I’m going to give some tips on how to pick a color and how to use the Liese Prettia dyes based on my own experience. I’ll also translate the official instructions, which I hope will take the stress out of using a Japanese dye!
What is the Kao Liese Prettia Awa-Color Range?

The full name of the Liese hair dye range is “Kao Liese Prettia Awa-Color”, or “Foam Color”. This dye is a really popular and affordable product that’s available at almost every drug store. It’s made by Kao, one of the biggest cosmetic manufacturers in Japan– they’re the same group behind the Biore and Japanese Nivea brands.
Currently, the Liese hair dye range comes in two sub-categories. There’s the popular standard range, which you might recognize from the very girly look of the boxes. There is also new, modern-styled “international” range, which takes inspiration from popular hair colors in Europe and America.
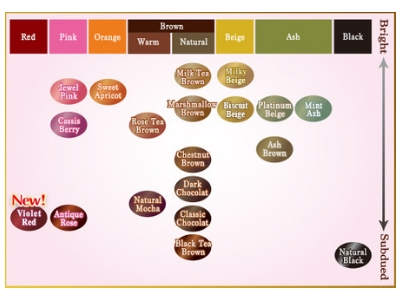
For both ranges, all of the colors are broken up into five categories: pink, warm brown, natural brown, beige, and ash.
The key feature of the Liese Awa-Color range is that it’s a foaming hair dye. There are a few advantages to using a foam type dye. For one, you can see what you’re doing more easily. In my experience, the foam texture also helps the hair stay together at the top of your head while you wait for it to set.
How to pick a color
One caveat about choosing a color is that they’re obviously designed for Japanese hair, which tends to be naturally quite dark. Depending on your natural hair tone, you might get a slightly different color to what is advertised.
Personally, I have very middle of the line brown hair, so I was actually a little worried about just how strong the product would be. Having used the Liese Prettia Milk Tea Brown color a few times, I can say the example photos were pretty accurate. Even though this is one of the lightest colors in the range, I didn’t experience any hair-frying bleach or a dramatic change, just a natural looking lightening effect.
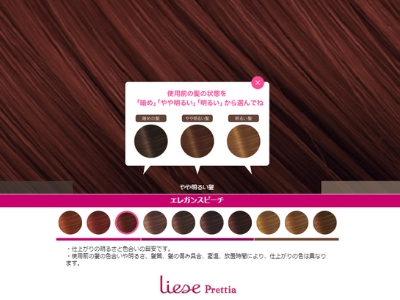
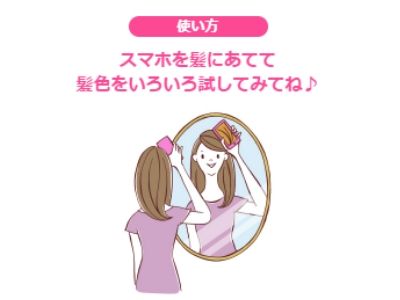
My biggest tip for choosing a Liese Prettia hair dye color is to use the Digital Sample smartphone tool on their website. It’s like an electronic version of the guide photos on hair dye boxes! Click on the square icon in the top left hand corner to pull up a chart with all the Liese Prettia hair colors. You can also click the bottom three shaded buttons (where the white arrows are pointing in the image above) to set the tool to simulate starting with dark, medium, or light hair. The idea is to access it on your smart phone, and then hold up the screen to your hair in a mirror to test how it looks with your complexion.
How to use
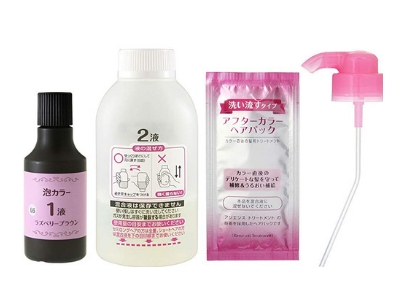
This is a translation of Kao’s instructions for the range. Remember to always check the instructions that come in the box before using! Before you start, comb out any tangles and apply a water-resistant cream to your hairline, ears, and neck to avoid color staining your skin (I recommend Vaseline!) Always perform an patch test, or allergy test, 48 hours before dying your hair, even if you’ve never had a reaction before.
Step One: Mix the dye
1. Add liquid 1 (smaller brown bottle) to liquid 2 (larger bottle).
2. Immediately screw on the flat lid. Turn the bottle upside down and back up again around five times, with each rotation lasting about one second. Be gentle– shaking the bottle can cause the ingredients to foam too early, making it hard to get out later.
3. Take off the flat cap, replace with the foaming cap, and close tightly.
Step Two: Create Foam
1. Put on gloves. With the bottle standing upright, firmly squeeze the middle of the bottle to pump out the foam.
Step 3: Apply foam
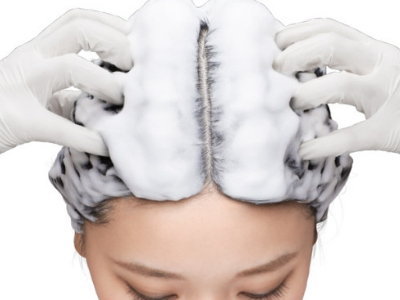
1. Take some foam in your hand and apply from your top part down. Don’t use the bottle to squeeze the foam directly into your hair.
2. Divide the back of your hair in two, and apply foam to each side of the hair.
3. Apply plenty of foam all the way down to the ends of your hair.
Step 4: Massage
1. Once all the foam is applied, gather your hair up at the top of your head. Using your fingertips, gently massage the foam through your hair. Don’t use the palms of your hands or rub too roughly.
Step 5: Check coverage, leave to set, and finish!
1. Check the foam is evenly applied, remove any residual foam from your skin. Run your fingers through your hair to make sure there are no tangles.
2. Leave to set. Wait 20-30 minutes from the time your hair is completely covered in foam.
3. Rinse well, shampoo the hair, then use the included the hair pack to finish the treatment.
I hope this review and how to guide was helpful! If you have any questions, let me know in the comments below. Don’t forget to check out our full range of Japanese hair products on Wonect.com!


